DNS means Domain Name System. It is a distributed naming system which is used to identify computers connected through the Internet or other Internet Protocol networks. A DNS server is a collection of servers that works together to provide internet access from one location. Each DNS server can be thought of as an extension of the Internet Protocol (IP) address, which is the source of each internet connection. When you visit a website using your smart phone or other mobile device, it uses your computer’s IP address to uniquely identify it. This allows your computer to reach any website easily. Cancellations on websites may result in the speedy connection of a webpage by another website’s servers.
However, cancelling on a website only affects that particular webpage, But the rest of the websites remain accessible until the original provider returns their requests with new addresses or timeouts. When you use a remote access tool such as a laptop or desktop computer, you don’t need to use the internet connection to connect to the server. Instead, you use the remote access tool to connect to the server through the Internet. If the remote access tool doesn’t have the IP address of the server, you can request it. After receiving a response, you can query the server to see what IP address is associated with the remote access tool.
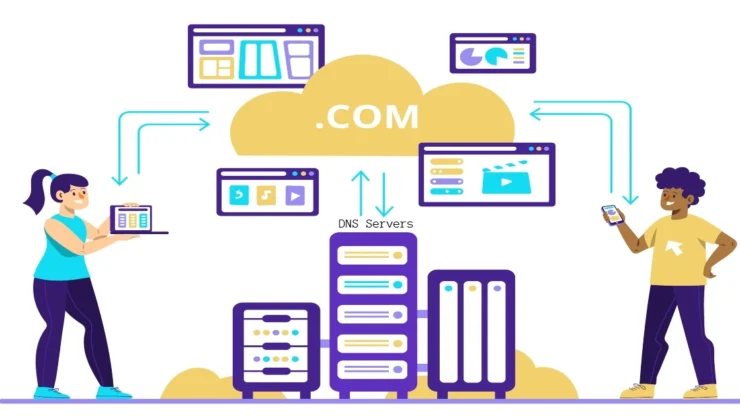
How DNS Works?
A DNS server is a system where a collection of computers is connected by an internet connection. A dns server has no Internet connection or any other network connection. Its job is to provide you with a unique IP address that is associated with the Internet. When you visit a website, your computer uses that ip address to reach your searched website’s server. Once you connect to a website, your computer knows its connectivity with that website and can continue to function. As if it was connected to that website’s server it functions properly. When you set up a DNS server, you firstly specify the name that the server should use when resolving requests from other internet sites.
You can also name your server dns1 if you want to resolve requests for your own website. DNS servers use DNS records while tracking the requests and responses from other websites. With the advent of technologies such as the World Wide Web server (W3S) and the Internet Protocol (IP) invention, DNS was found adding new domains to its network. These new records are called DNS records. When a website requests an address from your DNS server, it asks for the record that holds that address. This address can be found in the DNS header information for any website. With the introduction of the W3S project, all of the old DNS records were replaced by new records. The new records are called version 2 (or “2.0”).
How to Exchange DNS Records?
To exchange DNS records with other computers on the network follow the below steps:
1. Firstly, you need to understand the type of DNS Record you need to change
- Before changing the record find you your dns record type from the below reference:
- A Record – Connects your domain to an IP address.
- AAAA Record – Connects to an IPv6 address.
- CNAME Record – Points your domain to another domain.
- MX Record – Directs email to a mail server.
- TXT Record – Used for verification, SPF, DKIM, and security settings.
- NS Record – Defines your nameservers.
2. Log in to your domain registrar or hosting provider .
3. open the DNS management Section
4. Data Backup existing DNS records ( Take a screenshot of current DNS records Or copy all existing entries into a document)
5. Edit the required DNS Record
6. Adjust TTL and choose accordingly for Lower TTL or Higher TTL
7. Save and confirm changes
8. Wait for DNS Propagation
9 . Verify DNS Changes by using online DNS checker Tools or you can also use the command “nslookup yourdomain.com”
How to Add Names to your DNS Server?
To add new names to your DNS server, you need to do the following steps:
- Log in to your DNS Provider
- Open DNS management in your existing DNS records
- Click On Add Record or Add New
- Add a CNAME Record and save it
- Click on Verify Record , By doing this you will be able to verify the Name server
Wait for DNS Propagation which takes 5-30 minutes sometimes but in maximum 48 hours your DNS will be propagated.
Best DNS servers And Their Pricing
| DNS Provider | Type | Best For | Key Features | Security Level | Pricing |
| Cloudflare | Managed DNS | Bloggers, Businesses, High-traffic sites | Free plan, CDN, Fast global network | Very High (DDoS protection, DNSSEC) | Free + Paid Plans |
| Google Public DNS | Public DNS Resolver | Personal & General Internet Use | Fast resolution, Reliable uptime | High | Free |
| Amazon Web Services (Route 53) | Enterprise DNS | Large businesses & Applications | Scalable, Load balancing, Health checks | Very High | Paid |
| GoDaddy | Registrar DNS | Small websites | Easy setup, Basic management tools | Medium | Included with domain |
| Namecheap | Registrar DNS | Personal & Small Business | Free DNS, Simple interface | Medium | Free with domain |